00:00
00:00
SlashFirestorm
I don't even know what this is! This sort of thing ain't my bag, baby!

Age 38, Male

[Retired NG'er]

Old Folks' Home

Joined on 6/14/03

Level:
40
Exp Points:
17,453 / 17,760
Exp Rank:
1,233
Vote Power:
8.13 votes
Rank:
Scout
Global Rank:
41,959
Blams:
76
Saves:
139
B/P Bonus:
4%
Whistle:
Deity
Medals:
115

SlashFirestorm's News

Posted by SlashFirestorm - March 3rd, 2008


LEVEL 26: CHCHCHIP
PASSWORD: YVYJ
TIME LIMIT: 300
CHIPS REQUIRED: 170

Adventure Index

SUMMARY: A storehouse of chips that is guarded by several traps---bouncing Balls, a deadly Paramecium, and a Clone Machine set to produce Teeth.

EXPERIENCE: This is a tough one. The chips are spread across the level, and the dangers are likewise numerous. Before I begin on my personal walkthrough, let me say that whatever you do, SAVE THE CHIP BETWEEN THE BALL AND THE RED BUTTON UNTIL YOU'RE READY TO SPRINT TO THE FINISH.

I start by getting the line of chips on the top of the level, being careful to avoid the Ball. Then go down into the lines of chips and isolate the Paramecium. When it's circling around a single chip, lunge in and grab it and then immediately back off, and you've got about a 50/50 chance of surviving. If not...well, at least you died early.

Clear the trail of chips and head to the lower right corner. Ignore the Clone Machine for now, and head into through the toggle door into the right-side enclave. Head up, grabbing all the chips and avoiding the Balls. For the Ball "wave" at the very top, use the technique you used in Tossed Salad, waiting until the Balls ricochet in front of you and then running forward, sticking to the wall. This section can only be completed going from right to left, so don't try to do it early.

After you make it through, head down to the Clone Machine and head left, grabbing the chips between the walls and around the Red Button. Save the chip between the Ball and the Button for last; grab it and race upwards, getting the last few chips against the left wall, and sprint to the exit.

The only hard part of the level, really, is snatching the last chip from the Paramecium. Once you take care of that, the rest is easy enough. Although, if you get the wrong chip too early, you might find yourself in a bad situation...like in the image below.

SCORE: 243 seconds remaining, 15430 points.

TOTAL SCORE: 221580 points.

This level was a little hectic, but in the next, Chip should just Go With The Flow.

Slash Takes On Chip's Challenge: Level 26


Posted by SlashFirestorm - March 3rd, 2008


LEVEL 25: BLINK
PASSWORD: PQGV
TIME LIMIT: 600
CHIPS REQUIRED: 28

Adventure Index

SUMMARY: A sprawling maze interconnected by a series of teleports.

EXPERIENCE: This level is pretty complicated, but it's not nearly as bad as it looks. The gist of it is this: you pass through a teleport, grab a chip (or two, on some paths), then head back through and repeat it. Do the back-and-forth until you've got all the chips you can, and then find a teleport location that lets you access a different teleport, or lets you enter the one you came through from a different direction (leading you to a different path).

Once you've found a new teleport series, continue grabbing the chip(s) and repeating the process. To find all the chips in this level, you'll need to enter every teleport from every direction at least once, so be thorough.

The exit is located by entering the original teleport sequence vertically and back-and-forthing a bit. You should have plenty of time to complete this level.

SCORE: 346 seconds remaining, 15960 points.

TOTAL SCORE: 206150 points.

Chip kept his nerve and didn't blink. Next he'll have to brave a perilous paramecium and a Teeth-producing Clone Machine to grab a treasure trove of Ch-Ch-Chips...

Slash Takes On Chip's Challenge: Level 25


Posted by SlashFirestorm - March 3rd, 2008


LEVEL 24: OORTO GELD
PASSWORD: UNIZ
TIME LIMIT: 550
CHIPS REQUIRED: 48

Adventure Index

SUMMARY: This level consists of a large system of Toggle Doors and Gliders guarding the chips.

EXPERIENCE: In case the title of this level confuses you, it's a mutilation of "toggle door". Why? Because this level is composed of a shitload of Toggle Doors that block access to and from the chip chambers, as well as blocking the chips themselves.

The problem? The green buttons in this level are found outside of the toggle doors; you can open a door to get into a chamber, but there's no way to open any further doors. But don't worry---you'll have some help.

Two Gliders patrol the central room. This isn't your first experience with Gliders, although this is the first time that you face so many of them. They turn left when they hit an obstacle (their left), so you can anticipate their trajectories and manipulate it using the Brown Blocks available at the start of the level. The image below shows my preferred block setup, triggering the doors on and off rather quickly. The only danger to my setup is that you'll need to be careful getting in and out of the two toggle doors contained within the Glider zone.

After you've got the Gliders set up and toggling the doors at acceptable intervals, go chip hunting. Just watch out for the other Gliders in some of the side chambers and you'll be fine. Don't worry about the time limit---you've got damn near ten minutes to beat this level.

SCORE: 369 seconds remaining, 15690 points.

TOTAL SCORE: 190190 points.

Chip has a right to be cocky after making the monsters dance to his tune. But in the next level, his good luck could end in the Blink of an eye.

Slash Takes On Chip's Challenge: Level 24


Posted by SlashFirestorm - March 3rd, 2008


LEVEL 23: BLOBNET
PASSWORD: HUVE
TIME LIMIT: 500
CHIPS REQUIRED: 88

Adventure Index

SUMMARY: This level contains 88 chips...within a gravel-surrounded honeycomb of deadly Blobs.

EXPERIENCE: OH fuck, I hate this one. This level introduces the most dangerous enemy of all, the Blob. Blobs move completely randomly, meaning that you can't predict any sort of pattern or lure them into a trap. You risk your life whenever you come within one square of a Blob.

The strategy and hints section of the game's help files lists this level in particular, urging 'patience'. It's the correct strategy. Rushing through this level is a recipe for disaster. That shit might have flown in Digger, but it ain't gonna work here.

Stay in the gravel as much as possible. I recommend starting at one side of the level and working your way across one row at a time, moving lower as you collect the chips. As annoying as it is, only make your move for a chip when there is no Blob within one square of it---to do otherwise risks death, and with 88 chips in the level, the probability of carelessness-induced death is very high. When you have to cross floor to advance, do so quickly and with the same kind of patience.

Things actually get better as you start gathering chips. Blobs tend to congregate in large numbers, yeah, but they also leave more wide spaces in the corridors, too. By the time you have all the chips, you should be able to head for the exit at the center of the level without much difficulty.

This level got me just a wee bit frustrated. Like, screaming-racial-epithets-into-a-paper -bag frustrated. Not even uziwave's audio track Calm Minds and replacing the death audio file with sound bytes from Goodfellas could soothe my rage.

SCORE: 371 seconds remaining, 15210 points.

TOTAL SCORE: 174500 points.

If the next level, Oorto Geld, is anywhere near as frustrating as this, I will hang myself.

Slash Takes On Chip's Challenge: Level 23


Posted by SlashFirestorm - March 3rd, 2008


LEVEL 22: FORCED ENTRY
PASSWORD: WZIN
TIME LIMIT: 300
CHIPS REQUIRED: 8

Adventure Index

SUMMARY: A chaotic mess of force floors stretches from end to end over this level---and while there are no Suction Boots, there are eight chips for you to find.

EXPERIENCE: Pain in the ass. Like the level name suggests, you're going to have to force your way to the chips, as passively riding along the force floors will get you nowhere. Button-mash your way around, stepping off floors sideways to advance. When you see a chip, keep pressing the keys in its direction until you grab it. You may need to slide around a bit to find the correct direction to force your way in from.

There's no other strategy I can mention. Just force your way through. The exit (and a teleport back to the start) is in the lower right corner.

SCORE: 247 seconds remaining, 13470 points.

TOTAL SCORE: 159290 points.

This level was wild and out of control. But in the next level, Blobnet, Chip better use all the control he's got.

Slash Takes On Chip's Challenge: Level 22


Posted by SlashFirestorm - March 1st, 2008


LEVEL 21: ICEBERG
PASSWORD: UGRW
TIME LIMIT: 150
CHIPS REQUIRED: 9

Adventure Index

SUMMARY: A series of islands and ice floes make this level quite confusing. Too bad you don't have much time to try and figure it out.

EXPERIENCE: This level is complex and you don't have time to make any mistakes. You have two goals---find the nine chips, and find the exit. You are given no Flippers of Ice Skates in this level---the only tool at your disposal is a Brown Block-producing Clone Machine.

Step on the Red Button to make a block. You need to use these Blocks to make a path through the water to find your goals. Don't think you can be a smart-ass and just go right and into the exit square without having to pass through the Chip Sockets---there are invisible walls to remind you that cheating is bad.

Now, where do we push our blocks? The image below shows you the two paths that you must take. The icy path right above the Clone Machine leads to the exit; the path three squares to its right leads to the island with the chips.

When you push a block onto the ice, BE SURE TO FOLLOW IT. You have to pack down the dirt formed when a block falls in water---if you don't, the next block you push will bounce off of it and either crush you or prevent you from continuing. Either way, it's a failure. Travel after the block, pack down the dirt, then head back to the Clone Machine for another block.

Also be careful to not bring extra blocks---the same bounce-back effect can occur, killing you. Each path requires three blocks to complete.

Once you have the chips, start on the path to the exit. Other than the tight time limit, this level isn't that bad. Be sure to enter the icy path the same way you came, or you'll slip into the sea and drown.

SCORE: 93 seconds remaining, 11430 points.

TOTAL SCORE: 145820 points.

You know, maybe Chip wouldn't have to go through this crap if he just tried the next level's title on Melinda---Forced Entry.

:-(

Slash Takes On Chip's Challenge: Level 21


Posted by SlashFirestorm - March 1st, 2008


LEVEL 20: TOSSED SALAD
PASSWORD: KGFP
TIME LIMIT: 400
CHIPS REQUIRED: 15

Adventure Index

SUMMARY: This level is another test of your varied and now-numerous skills. Expect Bugs, Balls, and Tanks---you'll need to be fast on your feet to avoid all the dangers.

EXPERIENCE: The first area is a simple maze containing ten of the chips. It's patrolled by a single Bug that is misleadingly dangerous, so go forward with caution. Don't go into the dead-end corridor unless you know where the Bug is. Once you've got all ten chips, head to the teleport in the lower right corner. Don't worry about the Ball-activated Clone Machine trap that's set up in front of the teleport; even if you take your time in the maze, you should be long gone before it goes off.

The next area consists of a narrow corridor full of Tanks, with a Ball periodically activating a Blue Button to move the Tanks and a Green Button to switch the Toggle Doors. Just be patient and you'll be fine. Move forward slowly, making your way to the Red Key behind the Toggle Doors. Then, just as carefully, head to the Red Door and go through.

Ignore the four chips surrounded by fire. Go across the ice and grab the Fire Boots, then head back and grab them. Continue forward until you reach a narrow corridor ('The Metronome') and stop before entering it. When the bouncing Ball appears, step into the corridor and race left the moment the ball passes to your right. You'll have to be quick, as the Ball will only be a space or two behind you.

Next up is a large chamber with a locked Yellow Door and a series of Balls. Ignore them for now and ride the Force Floor to your left to the last chip. Alright, mission objective complete---but you still need a Yellow Key. Head down through the moving Tanks---sticking close to the wall---and you'll find it. Head back up and carefully pass by the Balls---you can't take the one-way Force Floor across this time, so you'll need to do it the old-fashioned way. Stay close to the wall and, like with the metronome hallway, wait until the first ball ricochets in front of you and then lunge forward. If you time it right, you'll pass through the Ball storm (LOL GODDAMN) with no difficulties.

Go through the Yellow Door and into the exit square.

...so, did you figure it out?

Did you?

Well, here it is: you don't need all the chips---or any of them---to finish this level. Whether it's a glitch or just a little secret, I don't know, but there's no Chip Sockets in Tossed Salad, despite the displayed chip requirement.

Why didn't I reveal this at the start of my walkthrough? BECAUSE I'M AN ASS, LOL

SCORE: 331 seconds remaining (without chip collecting), 13310 points.

TOTAL SCORE: 134390 points.

Well that level tested all that I've learned. Now let's head over to the Iceberg!

Slash Takes On Chip's Challenge: Level 20


Posted by SlashFirestorm - February 29th, 2008


LEVEL 19: DIGGER
PASSWORD: MRHR
TIME LIMIT: 210
CHIPS REQUIRED: 146

Adventure Index

SUMMARY: This level is composed of dirt floor, with a series of chip-filled corridors leading through it. Sounds good. The bad news? There are many Teeth monsters in this level, and only the chips---the chips that you need---stand between you and them.

EXPERIENCE: Think Indiana Jones---grab the treasure and run like fuck. Head through the tunnels as fast as you can, grabbing chips along the way. When you get to one of the chip-blocked Teeth pens, don't hesitate---lure the monster away from the chip (digging into the dirt floor if you must) and then grab it and move on.

The time limit doesn't allow much room for error, but the Teeth make rushing blindly through the level very dangerous. Try to memorize the tunnel network so you don't spend precious seconds looking for the next trail of chips.

Also, don't dig out of the corridors unless you absolutely have to. It may seem like a convenient shortcut, but going through dirt turns the squares to normal floor---meaning that the now-freed Teeth can follow you. Making new paths through the dirt can backfire, often resulting in you suddenly finding yourself trapped by Teeth coming in from every direction. The image below shows what happens to those who dig foolishly.

As soon as you have the final chip, though, make your way to the center of the level as quickly and agilely as possible---the Teeth will be everywhere now.

I died here more times than I'd like to admit...if you're more concerned about safety than speed, learn to travel in the dirt in ways to trick the Teeth into corners to avoid being chased. The dirt is the only cover you'll have here.

SCORE: 152 seconds remaining, 11020 points.

TOTAL SCORE: 121080 points.

Whew, that one was tough. I guess I'll go to level 20 now to get some Tossed Salad.

That's different from getting your salad tossed, by the way. :-O

EDIT: Fuck, MS Paint sucks at JPEG, lol.

Slash Takes On Chip's Challenge: Level 19


Posted by SlashFirestorm - February 29th, 2008


LEVEL 18: CASTLE MOAT
PASSWORD: HMJL
TIME LIMIT: 600
CHIPS REQUIRED: NONE

Adventure Index

SUMMARY: This large level is composed of a maze full of brown blocks, a large body of water, and a castle of blocks---where the exit is located. You must find a way across the moat to escape.

EXPERIENCE: This level isn't nearly as hard as it looks. I know what you think when you see the brown blocks---that you're gonna have to shuffle them down to the moat and create a path across. Ugh, that'll take forever, and it's easy to make a mistake. That's why you should follow my much simpler method.

Go around the moat (avoiding the bombs) and head into the maze. Ignore the blocks completely---just keep moving towards the upper right. You'll eventually get to a place where you have to move a block to get into the right corner---the upper block has Flippers under it. Grab them and head back to the moat, swim across, and you've got victory.

I'm not sure if it's possible to complete this level with blocks---it may be, but it would be a much more time-consuming pain in the ass---so I highly recommend going for the Flippers.

SCORE: 550 seconds remaining, 14500 points.

TOTAL SCORE: 110060 points.

All I'll just say is that the next level is called Digger. lol no rhyme here.

Slash Takes On Chip's Challenge: Level 18


Posted by SlashFirestorm - February 29th, 2008


My unofficial Chip's Challenge guide.

Alas, my former source for downloading the game is gone. If anyone knows of a download source, let me know via PM. I can also e-mail the required folders to people, if absolutely necessary; PM me for that, too.

If you want to track my progress and see my current passwords/high scores, check out my Adventure Index.

Notes, etc will be added as needed.

***************************

BASICS OF CHIP'S CHALLENGE

1. THE PROTAGONIST
The instructions for the game tell that Chip is an aspiring young nerd who wants to get into your fellow nerd Melinda's computer club, the Bit Busters. Yeah, right.

Here's the real scoop: Chip wants to get laid. Badly. Melinda's willing to give herself to him...but first Chip must prove that he's smart enough to be worthy of tapping that ass.

*****

2. THE LOCATION
Melinda's Clubhouse is a crazy ass place filled with her crazy experiments and challenges for Chip to conquer. It's full of puzzles and monsters and shit...not good news for our virgin hero.

*****

3. THE OBJECTIVE
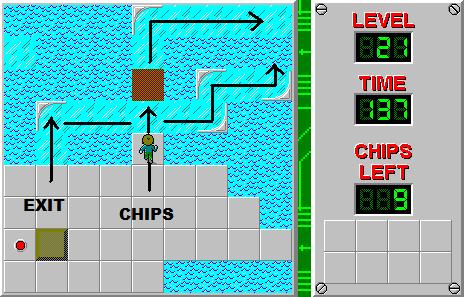
Simple version: Chip must find his way to the Exit Square in every level. In most levels, the exit square (and sometimes other paths) will be blocked by a Chip Socket that can only be removed by collecting a sufficient number of computer chips.

Some levels have no chips to collect; some levels have extra chips; some have just enough chips, meaning that you'll need to pick up every single one.

Not all levels require chips; not all have time limits. Sometimes you just need to get the fuck up outta there.

*****

4. THE SCENERY
These features compose the level structure.

STANDARD FLOOR---Light gray spaces. Anything can travel on them.

DIRT FLOOR---Blocks monsters and blocks, but turns to standard floor when Chip steps on it. Pushing a brown block into water will turn it into dirt, which must be packed down to cross over.

GRAVEL FLOOR---Monsters and blocks cannot go on gravel, but Chip can without restriction.

GRAY BLOCKS---Unmovable blocks that form the borders of the level and various walls and boundaries within them.

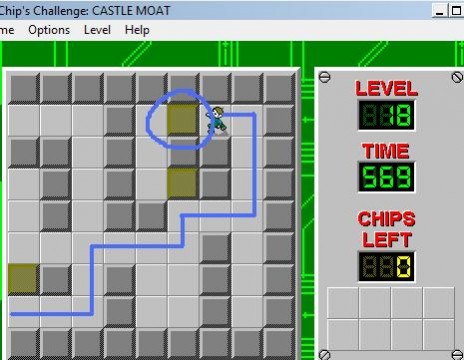
BROWN BLOCKS---Movable blocks that you can use for many purposes, such as redirecting monsters, creating paths over water, and placing on switches to activate them---or to bar enemy access to them. Items and traps can be hidden under them---only trial and error will reveal if something's underneath.

THIN WALLS---Bar access to adjacent squares, but do not take up any spaces themselves. Often used for mazes.

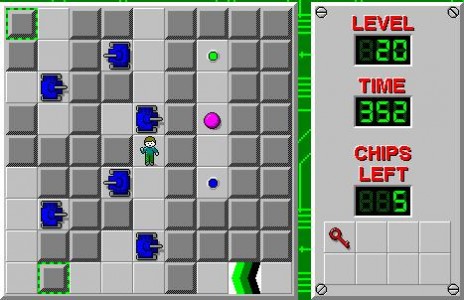
BLUE BLOCKS---Also called false blocks, these blocks may or may not be real. Touching them will turn them into a Gray Block if they are real, or make them disappear if they're not.

INVISIBLE WALLS---There are two varieties of invisible walls. One type becomes visible if touched, so you at least know its location; the second type stays invisible, requiring you to keep track of them in your head. Pain in the ass.

RECESSED WALLS---The squares with gray circles in them. Stepping on one turns it into a Gray Block---meaning that Chip can only cross a Recessed Wall square once per level. Be careful when crossing them, as it's easy to fuck yourself over and have to restart.

LOCKED DOORS---These doors require a key of the appropriate color to open.

BOMBS---Kill you on contact. They can be destroyed by using Brown Blocks or by directing monsters into them.

TOGGLE DOORS (GREEN BUTTON)---These doors alternate between opening and closing when a Green Button is pressed.

CLONE MACHINES (RED BUTTON)---The special gray squares with an item/monster on them. Will create a copy of the image whenever a Red Button is pressed.

BEAR TRAPS (BROWN BUTTON)---This brown circle space traps and holds anything that steps in them. Pressing a Brown Button will hold the trap open, allowing whatever is inside to escape. Use them to trap monsters where needed, and hold the buttons open with blocks (or trick monsters into stepping on them) when you need to cross.

BLUE BUTTON---Changes the direction of Tank enemies.

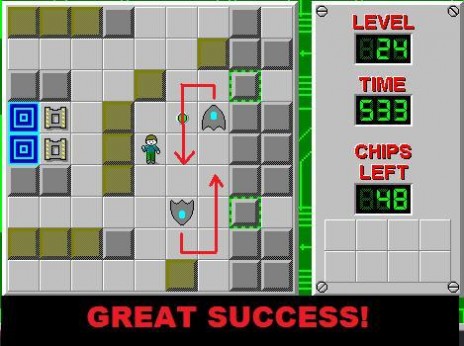
TELEPORTS---Blue circles that send you to another location when stepped on. Monsters and blocks can go through them, as well. Entering them from different directions may send you to different locations.

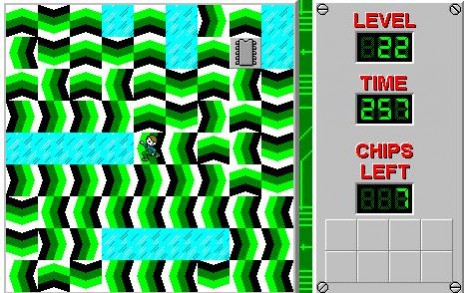
FORCE FLOOR---Acts like a conveyor belt, dragging you in the specified direction. You can step off them sideways, and can walk on them without difficulty with Suction Boots.

FIRE---Kills you on contact unless you're wearing Fire Boots.

WATER---Kills you on contact unless you're wearing Flippers.

ICE---You slide along ice in straight lines, at the mercy of directional walls, unless you have Ice Skates.

HINT SPACES---Step on them to get a hint about the level. They become increasingly rare after level eight. Keep in mind that the clock keeps ticking when you're reading them.

SPIES---Stepping on a Spy makes you lose all your tools (not keys).

*****

5. THE EQUIPMENT
Gather it whenever you can.

KEYS---Open colored doors. Green Keys can be used multiple times; all other keys are single-use. You can carry more than one of a type of key.

FIRE BOOTS---Let you cross fire.

FLIPPERS---Let you swim across water.

ICE SKATES---Let you walk across ice without sliding.

SUCTION BOOTS---Let you walk on Force Floors without being carried away.

*****

6. THE ENEMIES
Be on guard; some are predictable, some are not. Chip has no weapons, and can only evade enemies. There are some ways to trick them into dying, however, such as luring them into a Bomb or Bear Trap. Keep in mind that all enemies can trigger buttons. Loosely rated according to threat posed.

PINK BALLS---LOL. They bounce back and forth in straight lines.

TANKS---Travel in a straight line until they hit something. Whenever a Blue Button is pressed, all tanks in the level reverse direction and again go straight until collision.

BUGS---Bugs follow the left wall.

PARAMECIA---These fucks follow the right wall.

FIREBALLS---Turn to their right when they hit an object.

GLIDERS---Turn to their left when they hit any object. Only enemy that can travel across water.

WALKERS---Turn in a random direction when they hit any object. Unpredictable and dangerous.

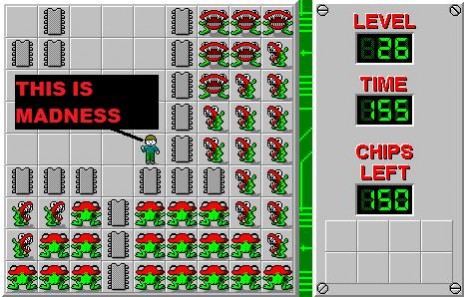
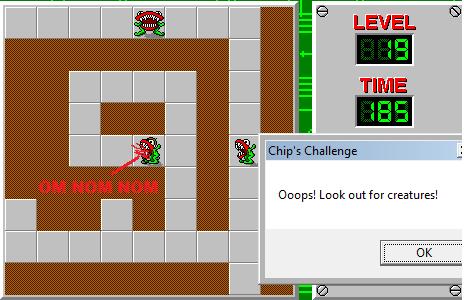
TEETH---These fucks chase you. They're not smart enough to go around obstacles in their way, but they're relentless. One of the most dangerous enemies.

BLOBS---Green slime monsters. They move completely randomly, making them exceedingly dangerous. Getting within one square of a blob could be the last mistake you ever make.

*****

7. SCORING
What you'll be doing if you beat the game.

LEVEL BONUS: 500 x (level number)
TIME BONUS: 10 x (seconds remaining)

You lose 20% of the level bonus every time you die or restart in a level. This penalty can be avoided by going back to the previous level and then forward again by hitting CTRL+P and then CTRL+N. However, this may prevent you from getting the "SHE WANTS IT" effect described below.

*****

8. YOU KNOW SHE WANTS IT
Melinda may be playing hard (as fuck) to get, but she still wants Chip's huge nerd cock inside her. If you struggle and die enough times in a level, she may give you the option to skip to the next one. However, you will get no points for the skipped level until you complete it.

Just dying doesn't seem to be enough---ie, jumping into water next to the starting point. The game seems to have some requirement for what it considers "effort"---whether it's spaces traveled or something, I don't know. Doing the back-and-forth trick described above to avoid death/restart penalties seems to prevent the skip option from coming up.

In any case, it's wussy to do so.

*****

[Back to Slash's Index Page]